Hi everyone,
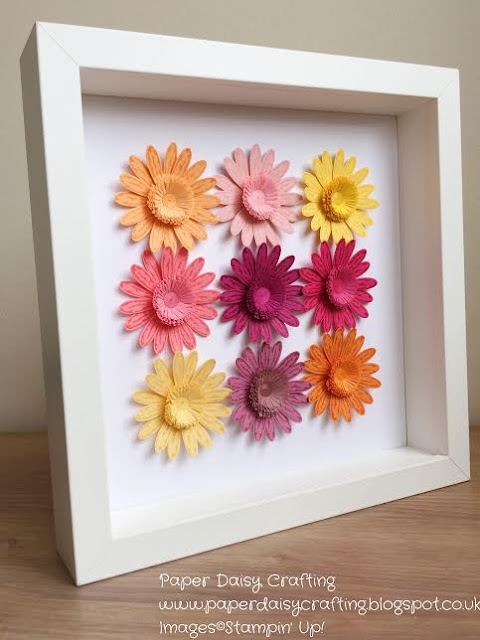
Bit of a blast from the past for you today. I wonder if you remember this framed picture I made last year when the Daisy Delight stamp set and coordinating punch were first released.
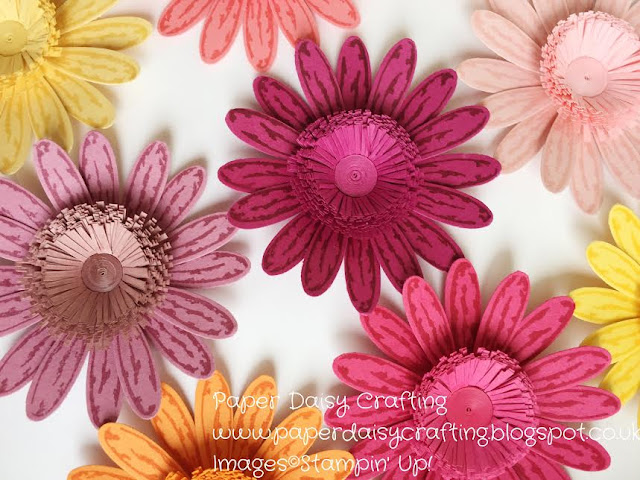
I love this artwork as it combines two of my loves - Stampin' Up! products and quilling. Some of you might know that I have a shop on Etsy, selling my quilled cards - have a look HERE if you are interested. At the time when I made the picture, I promised to record a video tutorial to show you how I made the quilled, fringed flower centres of the daisies. But then I completely forgot until reminded by one of my followers the other day.
So here it is, a bit (well, a lot - over a year!) late but better late than never as they say. Hope you enjoy it and that it will inspire you to have a go.
Watch the tutorial HERE or on the image below:
As I explain in the notes beneath the video I made some errors in the measurements I give in the tutorial, substituting the word "centimetres" instead of "millimetres" - I'm so sorry about that. The correct measurements are given below:
METRIC
10mm wide strip, 450mm long, make small cuts all the way along the strip leaving a 2mm gap at the edge
3mm wide strip, 450mm long
IMPERIAL
3/8 in wide strip, 18 ins long, make small cuts all the way along the strip leaving a 1/8 in gap at the edge
1/8 in wide strip, 18 ins long
As I explain in the video, you will need paper rather than cardstock for this project, which unfortunately Stampin' Up! does not supply. I buy my supplies from JJ Quilling in the UK, but I also save coloured paper (for example coloured envelopes from greeting cards) to make my own strips. There are other suppliers in the US, for example and you can probably buy basic quilling supllies from somewhere like Michaels's. If you have problems, leave me a comment below or on the video and I'll see if I can help.

All the products I have used to make this project are all available from my online shop. Simply click "Shop Now" button on the top of this page or click any of the images below to go direct to that item in my online Stampin’ Up! shop. If you order from my online shop please use my monthly shopping code (below) to receive a free thank you gift from me as I really appreciate your business. (If your order is £150 or more then please do not use my code as you will earn Stampin' Rewards in your own right and can choose your own freebies!)
If you would prefer a more personal service, have any questions or need help with your order, please either send me an email or give me a ring. I'll be more than happy to help. You can also find me on Facebook, Instagram, Pinterest and YouTube - links on the left of this page.
Product List Bit of a blast from the past for you today. I wonder if you remember this framed picture I made last year when the Daisy Delight stamp set and coordinating punch were first released.
I love this artwork as it combines two of my loves - Stampin' Up! products and quilling. Some of you might know that I have a shop on Etsy, selling my quilled cards - have a look HERE if you are interested. At the time when I made the picture, I promised to record a video tutorial to show you how I made the quilled, fringed flower centres of the daisies. But then I completely forgot until reminded by one of my followers the other day.
So here it is, a bit (well, a lot - over a year!) late but better late than never as they say. Hope you enjoy it and that it will inspire you to have a go.
Watch the tutorial HERE or on the image below:
As I explain in the notes beneath the video I made some errors in the measurements I give in the tutorial, substituting the word "centimetres" instead of "millimetres" - I'm so sorry about that. The correct measurements are given below:
METRIC
10mm wide strip, 450mm long, make small cuts all the way along the strip leaving a 2mm gap at the edge
3mm wide strip, 450mm long
IMPERIAL
3/8 in wide strip, 18 ins long, make small cuts all the way along the strip leaving a 1/8 in gap at the edge
1/8 in wide strip, 18 ins long
As I explain in the video, you will need paper rather than cardstock for this project, which unfortunately Stampin' Up! does not supply. I buy my supplies from JJ Quilling in the UK, but I also save coloured paper (for example coloured envelopes from greeting cards) to make my own strips. There are other suppliers in the US, for example and you can probably buy basic quilling supllies from somewhere like Michaels's. If you have problems, leave me a comment below or on the video and I'll see if I can help.
Back tomorrow with the new picture I made using the updated colour palette,

All the products I have used to make this project are all available from my online shop. Simply click "Shop Now" button on the top of this page or click any of the images below to go direct to that item in my online Stampin’ Up! shop. If you order from my online shop please use my monthly shopping code (below) to receive a free thank you gift from me as I really appreciate your business. (If your order is £150 or more then please do not use my code as you will earn Stampin' Rewards in your own right and can choose your own freebies!)
If you would prefer a more personal service, have any questions or need help with your order, please either send me an email or give me a ring. I'll be more than happy to help. You can also find me on Facebook, Instagram, Pinterest and YouTube - links on the left of this page.


This comment has been removed by the author.
ReplyDeleteSo beautiful Jill! I will try quilling now. You explained it very well. Thanks a lot for sharing! Kind regards, Anette from Germany
ReplyDeleteWOW! This is gorgeous. I might just have to look for my fringing machine to try this out. Thanks for the inspiration.
ReplyDeleteVery lovely Jill! Thank you so much for sharing:)
ReplyDelete