Hi everyone,
Hope you are well today. Thanks for stopping by to read my second post today!!
As promised yesterday, I'm back to show you the other cards I made based on the same design I posted about yesterday. This was the original design where I stamped on a Whisper White panel and mounted it on a coordinating coloured card base.
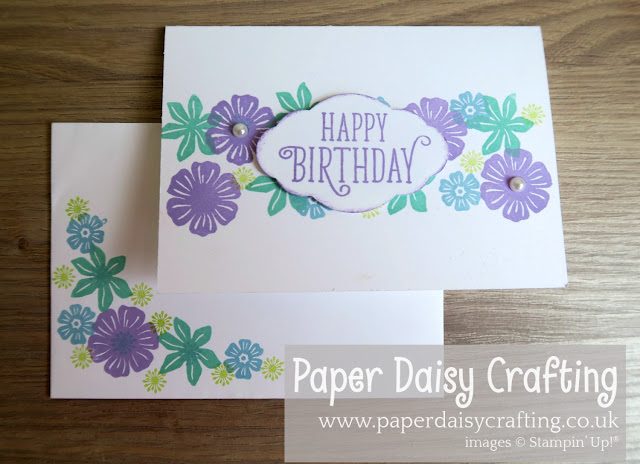
I wanted to use this design for a session I did with a group of first time stampers and so decided to simplify it even further. Instead of using a coloured card base I stamp directly onto one of our Whisper White note cards. I wanted to show the group some possible alternatives so I mixed it up a little bit by using different colours, some different sentiments and punches and even a different orientation but basically the design remained the same. So here goes - these were my sample cards for the session. First all, the one that was very similar to the one above:
As you can see, I also showed them how to decorate the envelope as well. We stamped inside the card too, but I forgot to take a photo!
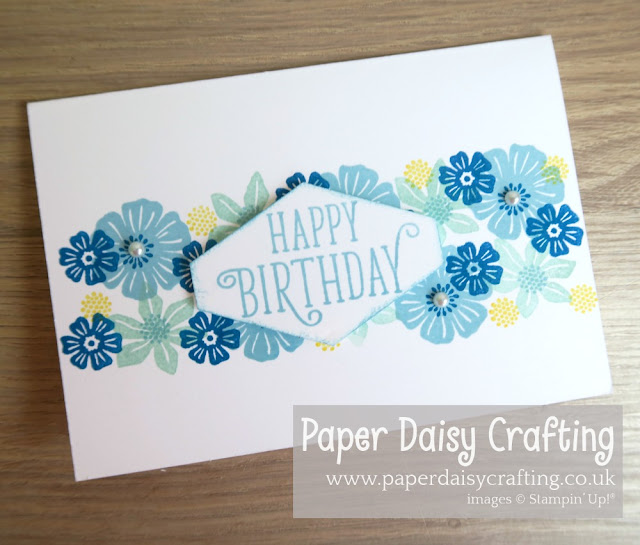
For this next card, the background stamping was more or less the same, but I changed the sentiment, using one of the stamps from the Lots of Happy card kit.
Here I used Blueberry Bushel, Balmy Blue and Daffodil Yellow. For this one I just changed the label punch I used - using the Tailored Tag punch instead of the Pretty Label punch.
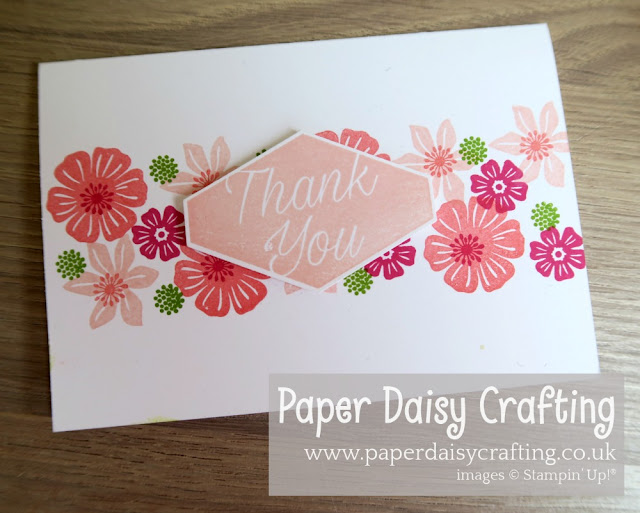
And for this one, in Flirty Flamingo, Melon Mambo, Petal Pink and Granny Apple Green I used the same punch and coordinating stamp set for the sentiment - Accented Blooms.
Lastly, back to the first colour scheme, but this time I changed the orientation to portrait rather than landscape.
So what do you think? Such a pretty set of cards with a few basic supplies. Hope you like them!
And just in case you missed it, here is the video tutorial for the basic design.
Back soon,
All the products I have used to make this project are all available from my online shop. Simply click "Shop Now" button on the top of this page or click any of the images below to go direct to that item in my online Stampin’ Up! shop. If you order from my online shop please use my monthly shopping code (below) to receive a free thank you gift from me as I really appreciate your business. (If your order is £150 or more then please do not use my code as you will earn Stampin' Rewards in your own right and can choose your own freebies!)
If you would prefer a more personal service, have any questions or need help with your order, please either send me an email or give me a ring. I'll be more than happy to help. You can also find me on Facebook, Instagram, Pinterest and YouTube - links on the left of this page.
Product List Hope you are well today. Thanks for stopping by to read my second post today!!
As promised yesterday, I'm back to show you the other cards I made based on the same design I posted about yesterday. This was the original design where I stamped on a Whisper White panel and mounted it on a coordinating coloured card base.
I wanted to use this design for a session I did with a group of first time stampers and so decided to simplify it even further. Instead of using a coloured card base I stamp directly onto one of our Whisper White note cards. I wanted to show the group some possible alternatives so I mixed it up a little bit by using different colours, some different sentiments and punches and even a different orientation but basically the design remained the same. So here goes - these were my sample cards for the session. First all, the one that was very similar to the one above:
As you can see, I also showed them how to decorate the envelope as well. We stamped inside the card too, but I forgot to take a photo!
For this next card, the background stamping was more or less the same, but I changed the sentiment, using one of the stamps from the Lots of Happy card kit.
Here I used Blueberry Bushel, Balmy Blue and Daffodil Yellow. For this one I just changed the label punch I used - using the Tailored Tag punch instead of the Pretty Label punch.
And for this one, in Flirty Flamingo, Melon Mambo, Petal Pink and Granny Apple Green I used the same punch and coordinating stamp set for the sentiment - Accented Blooms.
Lastly, back to the first colour scheme, but this time I changed the orientation to portrait rather than landscape.
So what do you think? Such a pretty set of cards with a few basic supplies. Hope you like them!
And just in case you missed it, here is the video tutorial for the basic design.
Back soon,
All the products I have used to make this project are all available from my online shop. Simply click "Shop Now" button on the top of this page or click any of the images below to go direct to that item in my online Stampin’ Up! shop. If you order from my online shop please use my monthly shopping code (below) to receive a free thank you gift from me as I really appreciate your business. (If your order is £150 or more then please do not use my code as you will earn Stampin' Rewards in your own right and can choose your own freebies!)
If you would prefer a more personal service, have any questions or need help with your order, please either send me an email or give me a ring. I'll be more than happy to help. You can also find me on Facebook, Instagram, Pinterest and YouTube - links on the left of this page.


No comments:
Post a Comment