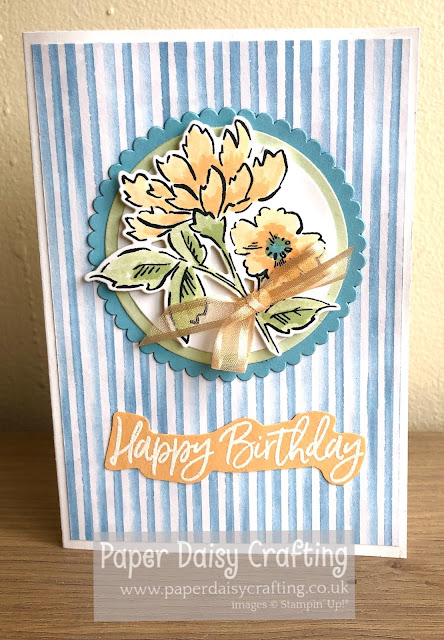
Welcome to my blog. Thanks so much for popping in to see me. Today I am bringing you the video tutorial for the card I brought you on Saturday for the InspireINK blog hop.
But before I talk about my project - just a couple of quick reminders.
Firstly I still have a few places available on the Paper Share I advertised last week. 66 sheets of double sided patterned paper for only £25 (UK only). HJust drop me an email at jilldchapman@gmail.com to reserve your spot. I will need all payments by midday on Friday 30th July.
If you'd like more details, you can read the original post by CLICKING HERE. Or click on any of the links at the bottom of this post to see the papers in more detail.
Secondly, I spent yesterday packaging and labelling copies of the new Mini Catalogue and Saleabration brochures ready to go in the post tomorrow. If you have requested a copy or have shopped with me since January this year, your copy of the catalogue will soon be plopping through your door ready for you to place your order as soon as it goes live on 3rd August! If that is not you and you do not already have a demo, please drop me a message and I'll be very happy to put one in the post to you. From 3rd August a PDF version of the catalogue will be available here on my blog, but it is so much more fun sitting down with the real thing with a cup of your favourite beverage and maybe a biscuit!!
Anyway, back to todays's project. For my card on Saturday I had to use the colours for the colour challenge but no such limitations when I made the alternative version on the video.
I love this method of watercolouring using one of our water painters and the ink from our stamp pads, with a clear block as the palette.
If you need a reminder of the original card, here it is - much bolder!!
To see how I made my card you can watch my video tutorial by CLICKING HERE or on the image below.
So what do you think? Will you be giving it a go?
Bye for now, have a great day, back soon,
If you'd like to make sure you don't miss any of my posts or projects, just sign up for email notifications by clicking the green button below. You will receive an email to confirm your email address which you will need to click on to complete the sign up. This email may go to your spam folder so do please check there after you sign up. Once signed up, you'll receive an email each time I publish a post. You can unsubscribe at any time!
All the products I have used to make this project are available from my online shop. Simply click "Shop Now" button on the top of this page or click any of the images below to go direct to that item in my online Stampin’ Up! shop. If you order from my online shop please use my monthly shopping code (below) to receive a free thank you gift from me as I really appreciate your business. (If your order is £150 or more then please do not use my code as you will earn Stampin' Rewards in your own right and can choose your own freebies!)


No comments:
Post a Comment